This details how to proceed with the outrigger deployment, crane function inspection, testing and logging, boom extension and crane setup, and load chart and deduction checklist write-in during the training events.
(Note: The administrator can skip individual sections by pressing "V")
1. Deploy the Outriggers
To deploy the outriggers and level the crane, select either extend mode or retract mode from the Retract & Extend Mode Buttons by clicking once on the action you'd like to perform. The Retract/Extend Mode Indicator shows which function is currently in use. Next, click and hold on the outrigger panel that you wish to extend/retract. The outriggers are displayed relative to the user's position in the center of the crane, and the axles and carbody of the crane are represented by the white lines. A panel will glow red if the outrigger is off the ground.
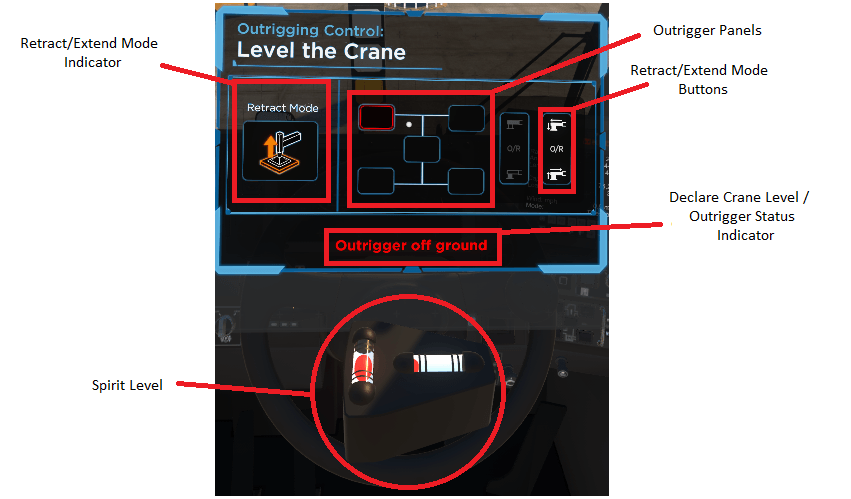
Use the Spirit level to determine whether the crane is within 1% of level, then press the Declare Crane Level button.
2. Test Crane Functions and Enter Daily Log
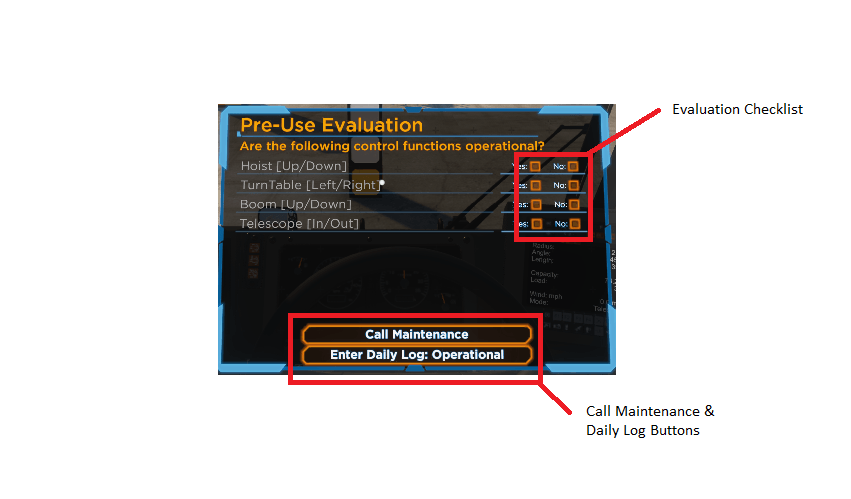
Test all crane functions as indicated, and use the provided interface to log the operational status of each control. If one or more controls is malfunctioning, check No beside the line on the evaluation checklist, check all other functions and enter as appropriate, and click on the Call Maintenance Button. Then, check each function again and repeat the above steps as necessary. Once all controls are functioning as intended, enter Yes on each of the checkboxes, then press Enter Daily Log: Operational.
3. Extend the Boom and Navigate the Hook for Rigging
First, extend the boom to the length indicated. You may need to hoist down during the boom extension to avoid triggering the Anti-2-Block device. Once the boom is at the indicated length, navigate the hook block or headache ball to the hook indicator, pictured below:
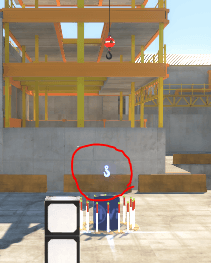
The hook indicator will gradually change color as the hook approaches, and will turn green when it's at the correct position. Hold the hook there to move to the next step.
4. Fill out the Deduction Checklist
Look at the deduction checklist to your right:
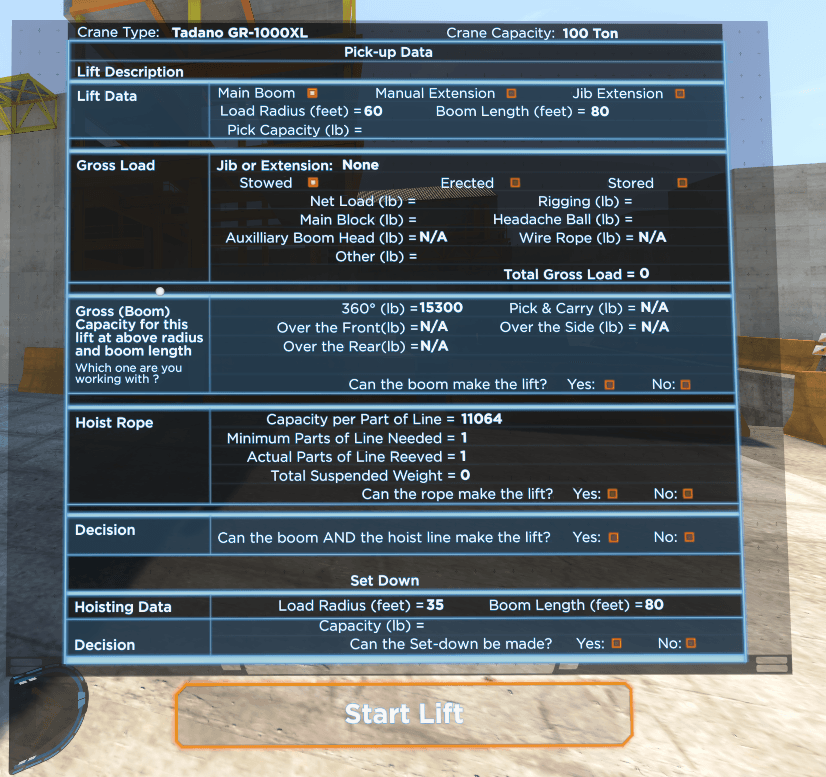
You need to fill out the Pick capacity at the lift and set down points. You can do this by selecting the appropriate cell from the load chart to your left:
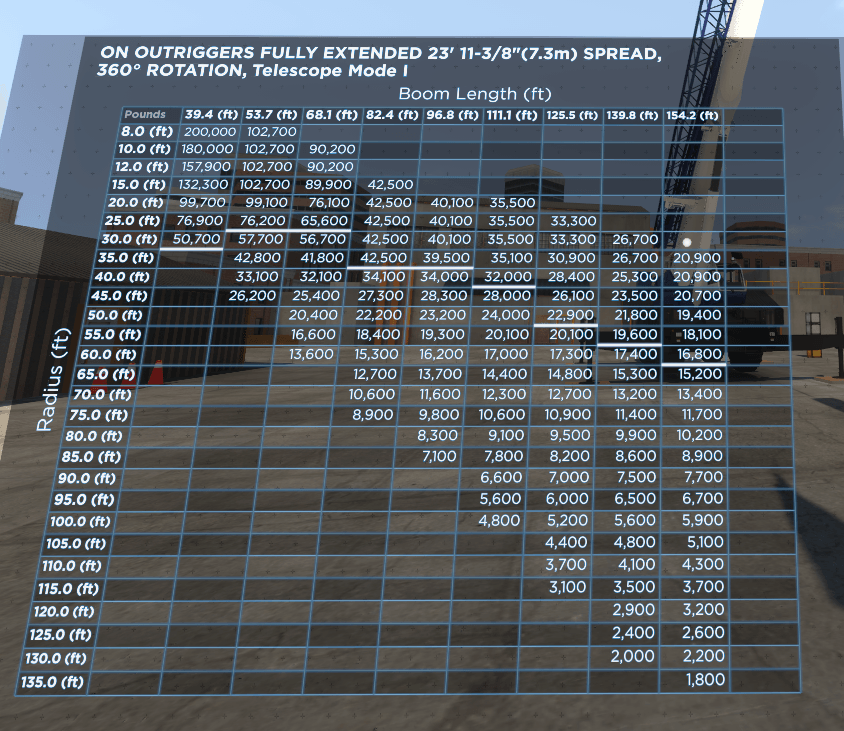
(For the purposes of the demonstration, the manufacturer recommendations are, when choosing between two radius rows, choose the one with the longer radius, and when choosing between two boom length columns, choose the one that is closest to the actual boom length.)
You can click on the cell and select "Copy" to copy the number, and paste it in the appropriate cell on the deduction checklist.
After your pick and set down capacities are selected, look at the load and rigging, and click on each part to highlight and add the components. In some cases, you may need to look up at the boom tip to see a component.
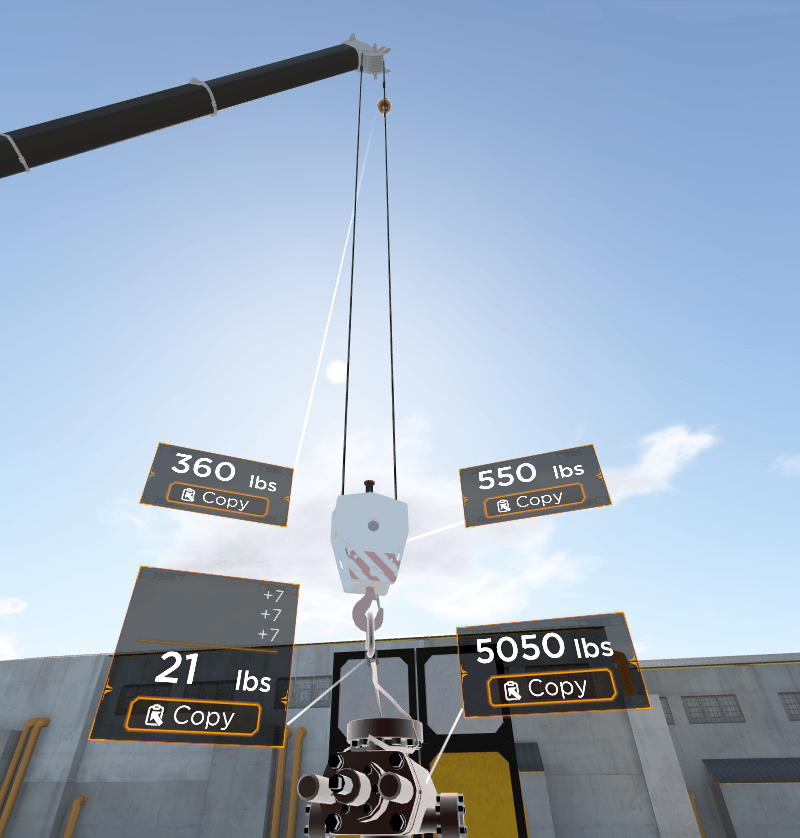
As with the load chart, you can copy each of these numbers and paste them into the load chart as well. Be sure to fill Zeros in on all other entries in the load chart, where appropriate (e.g. other deductions).
After the checklist is filled out, decide under the bottom four sections under the crane whether the crane can make the lift and set-down, and if so, press "Start Lift"